Who says dressers have to be wood, black, or white? Here, we’ll show you some of our top DIY dresser makeovers that embrace color. We’ve used affordable materials and simple methods to create dressers that bring flair to your home and impress your visitors. You can try these techniques on an old or secondhand piece of furniture, or start with a basic dresser to customize it your way.
Handpainted Dresser

This DIY dresser gets a stylish upgrade with glossy paint and a clean white outline. To achieve the same look, start by prepping your dresser—sand, clean, and prime it. Then, apply semigloss enamel paint (like Valspar’s Enchanted Forest). Use a small paintbrush or a white paint marker to create the outline, either freehand or with a straightedge or painter’s tape. Highlight decorative areas to accentuate the dresser’s curves.
Dresser with Wallpaper

Give an old dresser a new life by covering it with wallpaper featuring a print, pattern, or texture you adore. Ensure the drawers have a smooth front because textured surfaces won’t work well with wallpaper. The great thing about using wallpaper for a DIY dresser makeover is that a small roll sample is sufficient to update four small drawers! Begin by sanding, priming, and painting the dresser for a solid base. Measure and cut the wallpaper accurately using a utility knife. Attach it using spray adhesive, and smooth out any air bubbles. For the finishing touch, look for unique vintage drawer knobs at a local flea market to complete your refreshed dresser.
DIY Campaign Dresser

The campaign dresser is loved for its practical yet elegant style, which you can easily recreate with paint and hardware. Adding brass hardware can give it a glamorous touch. If you don’t have space for it in your bedroom, you can use this revamped dresser to store linens and extra dining sets in your dining room.
Paint the dresser in your chosen color—don’t shy away from bold choices! Also, spray-paint the hardware to match. Attach the L brackets to the corners of each drawer, then position the handles in the center of each drawer and secure them with screws.
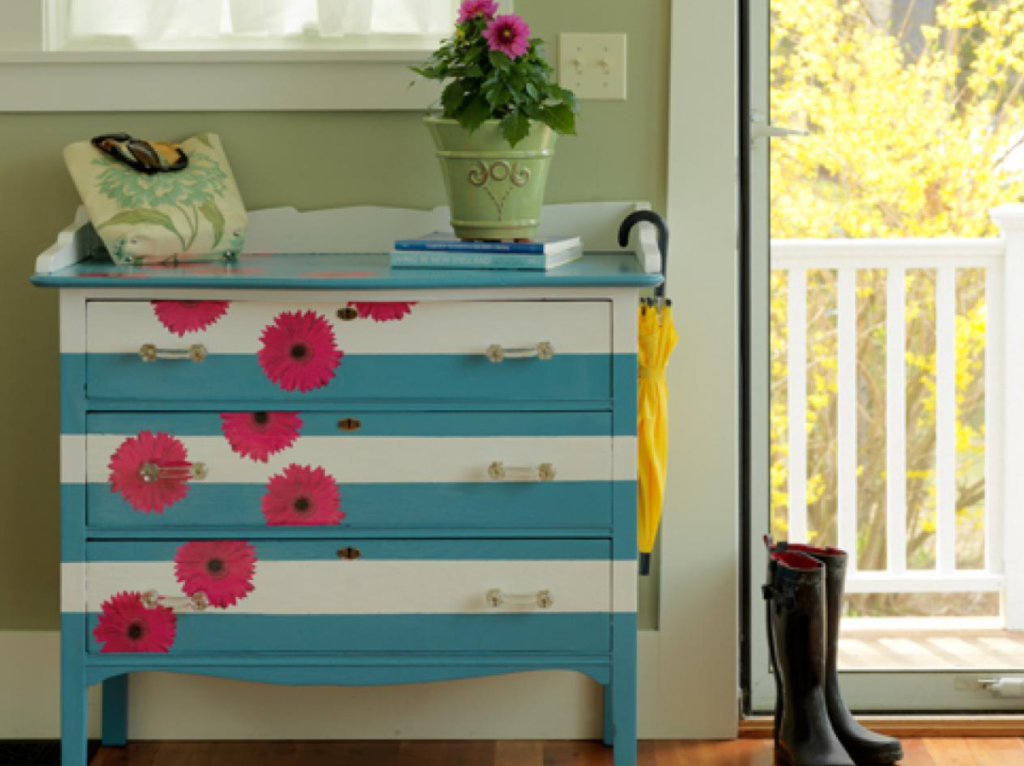
Striped DIY Dresser

We adore the bold statement colorful stripes against the white background. Swapping out the old door pulls with modern ones complements the dresser’s linear patterns.
Start by sanding and priming the dresser, remembering that the primer color will be visible. Use painter’s tape to create stripes of different widths and uneven spacing. You can choose the colors and number of stripes as you like. Ensure the paint is fully dry before applying the painter’s tape over the design again.
Textured Ombre DIY Dresser

Create a playful dresser with paint and wooden blocks in this DIY makeover, ideal for a kid’s room.
Start by priming the dresser in one light color. Divide the dresser into three sections and paint the top and middle sections with their respective colors. Blend the colors where they meet using a mixture of the two shades. Repeat this for the middle and bottom sections. Cut the wood blocks into squares and rectangles and place them on the drawer fronts. Paint the blocks in your chosen colors and secure them with wood glue.
Artful DIY Dresser

Art isn’t just for walls—it can also jazz up your dresser. With some simple materials and a large poster, you can transform a plain dresser into a stunning pattern. Begin by priming the dresser and taking out the drawers. Use spray adhesive to stick the artwork onto the dresser’s frame, then trim the excess paper once it dries. Repeat this process for the drawers: spray adhesive, apply the art, and trim the edges. Finish off by adding new knobs to the dresser.


